

In this article, we will build a dashboard using the planetscale database and Django. We will explore the use of planetscale free account and extensibility.
Prerequisites
Must have knowledge of python and Django
Free Planetscale account
Must have knowledge of HTML, CSS and Bootstrap
Must have a suitable code editor e.g vscode
What is Planetscale?
Planetscale is a SQL-based serverless database platform. It allows you to build scalable web applications with easy integration.
Planetscale offers Django ORM support to developers. We will be digging into this for a short time. You can learn more about planetscale here: Planetscale's documentation
Getting started
The first thing we need to do is to create a free account on the planetscale website. we can create a free account using Github or an email address. That can be done here: Sign up for planetscale
Create a new database
Each free tier user can create one free database. On the dashboard, click on the create your first database button. You should have a similar page to this:
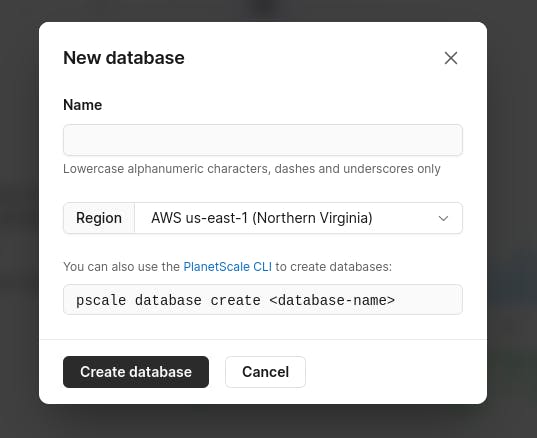
The next thing is to fill out the form, we need to ensure that we pick the region closer to us. After successfully creating the new database, we should have a screen similar to this
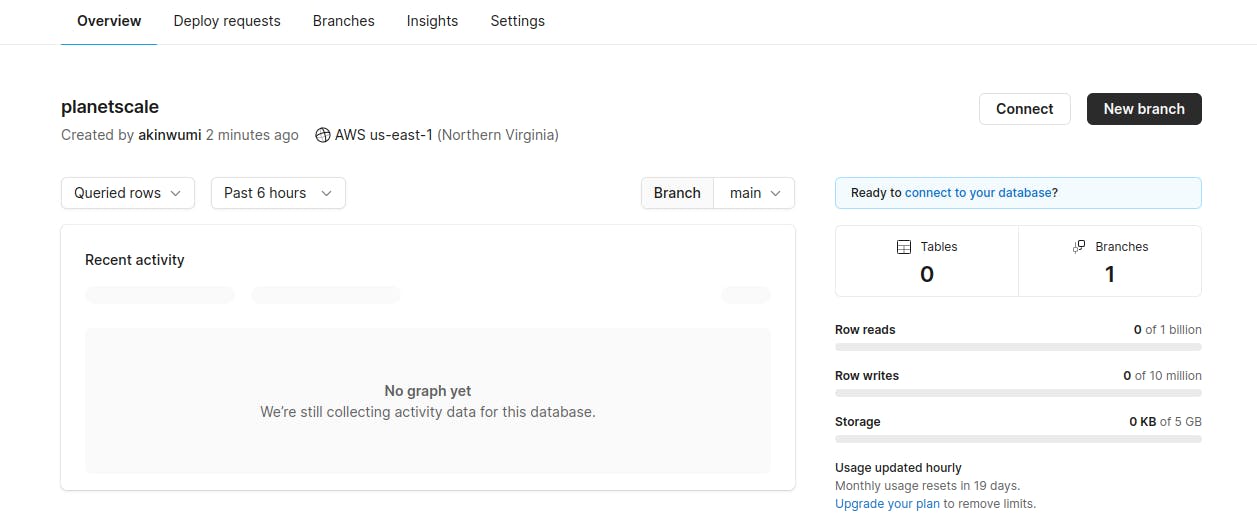
Getting connection parameters
We need a username and password to connect to our Django app. Planetscale auto-generates this for us. To get the details, click on the connect button. This will display a username and password. We are to copy this username and password somewhere because it is only displayed once.
Getting Started with Django App
We will be creating a simple Django app that performs CRUD functionalities. We will create a dashboard that manages sets of customers.
Starting Django Project
To start a Django project, we need to run
django-admin startproject 'project_name'
Inside the root folder of our project, we need to create our virtual environment. To do this we need to install virtualenv if it'svi not already installed .
pip install virtualenv
To create our virtual environment
virtualenv env
This will create a virtual env called env
Setup database
After getting the database password and username from planetscale. it is best to export those credentials to the virtual environment. Inside the activate file of our env folder, paste
export DB_HOST="your_host"
export DB_PORT=3306
export DB_DATABASE="your_database_name"
export DB_USER="_given_username"
export DB_PASSWORD="_given_password"
export MYSQL_ATTR_SSL_CA="/etc/ssl/certs/ca-certificates.crt"
Then deactivate and reactivate virtualenv. The details are safe now.
In settings.py, import os and configure the database settings as follows
DATABASES ={
   'default':{
       'ENGINE':'django_psdb_engine',
       'NAME':os.environ["DB_DATABASE"],
       'USER':os.environ["DB_USER"],
       'PASSWORD':os.environ["DB_PASSWORD"],
       'HOST':os.environ["DB_HOST"],
       'PORT':os.environ["DB_PORT"],
       'OPTIONS':{'ssl':{'ca':os.environ["MYSQL_ATTR_SSL_CA"] }}
   }
}
This will read the database passwords and usernames saved in our virtual environment.
Install Planet scale database engine
We need to install the psdb engine from GitHub for our app to run on planetscale. Navigate to the project folder from the terminal and run the clone function
git clone https://github.com/planetscale/django_psdb_engine.git
Create app model
In models.py of our created app,
class Customers(models.Model):
   first_name = models.CharField(max_length=200)
   last_name = models.CharField(max_length=200)
   email = models.EmailField(max_length=200)
   created_on = models.DateField(auto_now_add=True)

   def __str__(self):
       return self.email
We need to run makemigrations and migrate to planetscale database
python manage.py makemigrations

python manage.py migrate
Setting up our App
we need to create the app we will be working with and to do this
python manage.py startapp 'app_name'
The next step is to add our new app to the list of installed apps. In settings.py add
INSTALLED_APPS = [
    'django.contrib.admin',
    'django.contrib.auth',
    'django.contrib.contenttypes',
    'django.contrib.sessions',
    'django.contrib.messages',
    'django.contrib.staticfiles',
    'app_name'
]
Configuring Django Projects
To enable our app to function correctly we need to set up a few things like the URLs, static directory and templates.
Setup static settings
Setting up a static directory tells our app which directory to look into while serving static files like images. in settings.py, add
STATIC_URL = '/static/'
STATICFILES_DIRS=(os.path.join(BASE_DIR,'assets')),
Our Django app will always look into the 'assets' directory to serve static files.
Create assets directory
we need to create a new directory called assets in the root folder of our project. We shall house other files and directories required for this folder shortly.
in the assets directory, create a new css directory, then create a CSS file called admin.css. Add the codes below into the CSS file
:root{

   --color-dark:#1d2231;
   --text-grey:#8390a2;
   --main-color:#0A203B;
   --secondary-color:#FFF200;


}

*{
   font-family: 'poppins', sans-serif;
   margin:0;
   padding:0;
   text-decoration:none;
   list-style: none;
   box-sizing:border-box;
}


#sidebar-toggle{
   display: none;
}


.sidebar{
   height: 100%;
   width: 240px;
   position: fixed;
   left:0;
   top:0;
   z-index:100;
   background: var(--main-color);
   color: #fff;
   overflow-y: auto;
   transition:width 500ms;


}

.sidebar-header{
   display:flex;
   justify-content:space-between;
   align-items: center;
   height:60px;
   padding: 0rem 1rem;

}

.sidebar-menu{
   padding: 1rem;
}

.sidebar ul{
   margin-bottom: 1rem;
}

.sidebar li{
   margin-bottom: 1.2rem;
}

.sidebar li a {
   color: #fff;
   font-size: .9rem;
   text-decoration: none;
}


.sidebarli:first-child a{
   background: rgba(0, 0, 0, 0.7);
}

.sidebar a span:last-child{

   padding-left: .6rem;

}

#sidebar-toggle:checked ~ .sidebar{
   width:60px;
}


#sidebar-toggle:checked ~ .main-content{
   margin-left: 60px;
}


#sidebar-toggle:checked ~ .main-content header{
   left: 60px;
}


#sidebar-toggle:checked ~ .sidebar .sidebar-header h3 span,
#sidebar-toggle:checked ~ .sidebar li span:last-child{
   display: none;

}


#sidebar-toggle:checked ~ .sidebar .sidebar-header,
#sidebar-toggle:checked ~ .sidebar li{
   display: flex;
   justify-content: center;

}


.main-content{
   position:relative;
   margin-left:240px;
   transition: margin-left 500ms;
}

main{
   background: #eeeeee;
   min-height: 100vh;
   padding: 4rem 3rem;


}


.card-panel{
   background: #fff;
   border-radius: 6px;
   margin: 10px;
}

.customers,.add-user{
   background: #fff;
   padding: 3rem 5rem;
}


.message .alert{

   padding: 20px;
   background: var(--secondary-color);
   justify-content: center;
   width: 50%;
   transition:0.5s;
}


@media screen and (max-width:1200px) {

  .sidebar{
      width: 60px;
      z-index: 150;
  }

.main-content header{
   left: 60px;
   width: calc(100% - 60px );
}


.main-content{
   margin-left:60px;
}

.sidebar .sidebar-header,
.sidebar li{
   display: flex;
   justify-content: center;
}

.sidebar .sidebar-header h3 span,
.sidebar li span:last-child{
   display: none;

}


#sidebar-toggle:checked ~ .sidebar{
   width:240px;
}


#sidebar-toggle:checked ~ .main-content{
   margin-left: 60px;
}


#sidebar-toggle:checked ~ .main-content header{
   left:60px;
   width:calc(100% -60px);
}


#sidebar-toggle:checked ~ .sidebar .sidebar-header h3 span,
#sidebar-toggle:checked ~ .sidebar li span:last-child{
   display: inline;

}


#sidebar-toggle:checked ~ .sidebar .sidebar-header,
{
   display: flex;
   justify-content: space-between;
}
#sidebar-toggle:checked ~ .sidebar li{
   display:block;
}
}
Setup URLs
We need to set up our URLs to ensure the proper routing of our web pages. In the urls.py of our root folder
from django.contrib import admin
from django.urls import path,include

urlpatterns = [
    path('admin/', admin.site.urls),
    path(' ',include('app_name.urls'))
]
This will point our website to our web application on a visit. The next step is to create a urls.py file in the application we created.
from . import views
from django.urls import path


urlpatterns = [


]
Setup templates
We need to configure the template settings in our settings.py. Before we do this, we need to import os by simply adding import os at the beginning of our settings.py.
TEMPLATES = [
    {
        'BACKEND': 'django.template.backends.django.DjangoTemplates',
        'DIRS': [os.path.join(BASE_DIR,'templates')],
        'APP_DIRS': True,
        'OPTIONS': {
            'context_processors': [
                'django.template.context_processors.debug',
                'django.template.context_processors.request',
                'django.contrib.auth.context_processors.auth',
                'django.contrib.messages.context_processors.messages',
            ],
        },
    },
]
With the settings above, our django website will check any directory called templates for its HTML rendering. In the project root, create a templates directory and create an HTML file layout.html
Inside layout.html
{% load static %}

<!DOCTYPE HTML>
<html>
  <head>
      <meta charset="utf-8">
  <meta name="viewport" content="width=device-width, initial-scale=1, shrink-to-fit=no">

    <title>ingenious</title>


    <link href="https://cdn.jsdelivr.net/npm/bootstrap@5.0.2/dist/css/bootstrap.min.css" rel="stylesheet"       integrity="sha384-EVSTQN3/azprG1Anm3QDgpJLIm9Nao0Yz1ztcQTwFspd3yD65VohhpuuCOmLASjC" crossorigin="anonymous">
  <script src="https://use.fontawesome.com/48145d5cf6.js"></script>
   <link href="{% static 'css/admin.css' %}" rel="stylesheet">
  </head>
</html>
<body>

  <input type="checkbox" name="" id="sidebar-toggle">
          <div class="sidebar">
              <div class="sidebar-header">
                  <h3 class="brand">
                      <span class="fa fa-link"></span>
                      <span>ingenious</span>
                  </h3>
                  <label for="sidebar-toggle" class="fa fa-bars" ></label>
              </div>
              <div class="sidebar-menu">
                  <ul>
                      <li>
                          <a href="">
                              <span class="fa fa-home"></span>
                              <span>Home</span>
                          </a>
                      </li>

                      <li>
                          <a href="">
                              <span class="fa fa-user "></span>
                              <span> Customers </span>
                          </a>
                      </li>

                      <li>
                          <a href="">
                              <span class="fa fa-envelope"></span>
                              <span>Email</span>
                          </a>
                      </li>

                      <li>
                          <a href="">
                              <span class="fa fa-arrow-right"></span>
                              <span>Logout</span>
                          </a>
                      </li>

                  </ul>

      </div>
              </div>

   <div class="main-content">

      <main>
        {% if messages %}
        {% for m in messages %}
        <div class="alert alert-{{m.tags}}" role="alert">
            <p>{{m.message}}</p>
        </div>
        {% endfor %}
        {% endif %}

        {% block content %}


        {% endblock %}

    </main>


  </body>
</html>
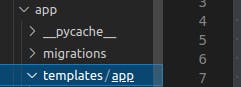
Inside our app folder, we need to create a directory called templates. After creating this, we need to create another directory that bears our app's name. You should a folder structure similar to this
Dashboard views
To be able to use our Django app, we need to start the server
python manage.py runserver
Importing python modules
we need to import the necessary python modules in our views.py
from django.shortcuts import render,redirect
from django.contrib.admin.views.decorators import staff_member_required
from .models import Customers
from django.contrib.auth.models import User
from datetime import datetime
from datetime import timedelta
from django.contrib import messages
from django.http import HttpResponse
import csv
from django.core.mail import send_mass_mail
from django.core.exceptions import ObjectDoesNotExist
Create superuser
To be able to access the full website, we need to create either a staff user or superuser account
python manage.py createsuperuser
Follow the instructions to create the user. After this, we will prompt to log in whenever we try to use our app. Just input the username and password to log in.
Index View
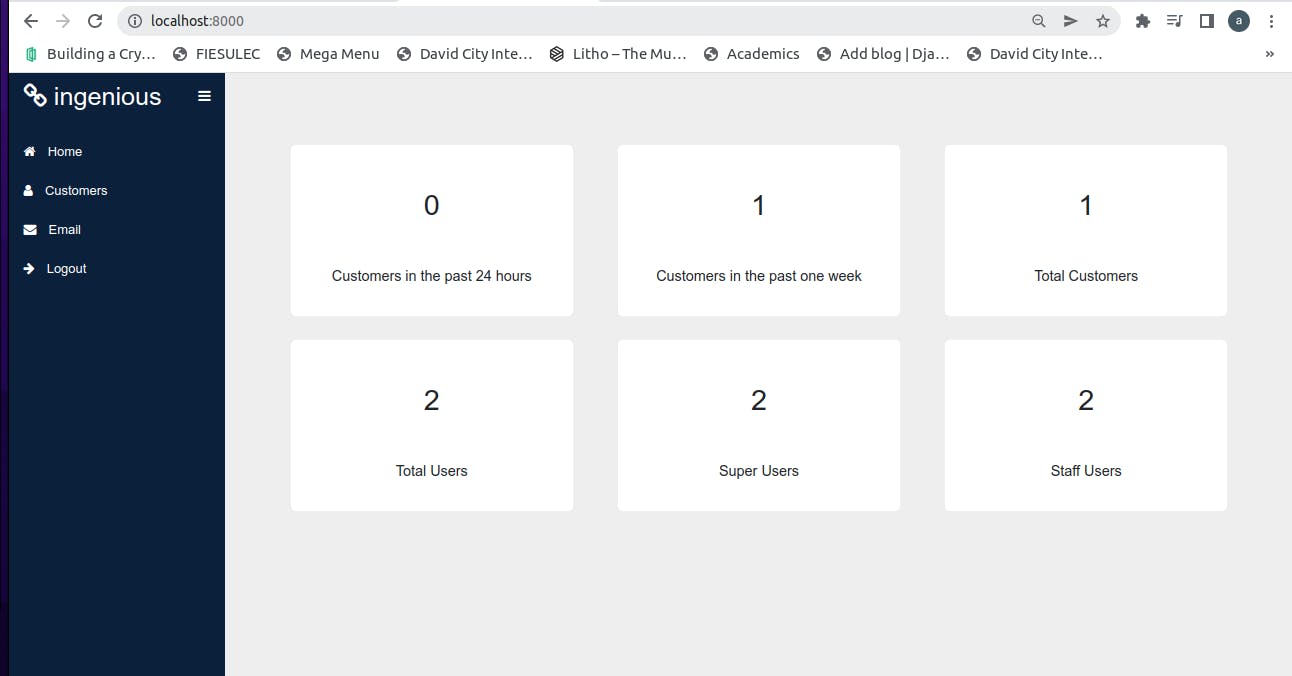
We want to be able to see little information from our dashboard when we login, we want to be able to see the following
Number of customers that registered within the last 24 hours
Number of customers that registered within the last week
Total number of customers
Total number of dahboard users
Total number of Super users
Total number of Staff users
In our 'views.py', we need to send the user to a homepage when our dashboard is visited. To do this we need to create a function in our views.py
@staff_member_required
def Index(request):
    if request.user.is_authenticated:
        total_customers = len(Customers.objects.all())
        within_24_hours = len(Customers.objects.filter(created_on__gt=datetime.now() - timedelta(1)))
        within_past_week= len(Customers.objects.filter(created_on__gt=datetime.now() - timedelta(7)))
        total_users = len(User.objects.all())
        super_users=len(User.objects.filter(is_superuser=True))
        staff_users=len(User.objects.filter(is_staff=True))
        context = {
            "total_customers":total_customers,
            "within_24_hours":within_24_hours,
            "within_past_week":within_past_week,
            "total_users":total_users,
            "super_users":super_users,
            "staff_users":staff_users
        }
        return render(request,'app/index.html',context)
In our 'urls.py', add a path pointing to this function.
from . import views
from django.urls import path


urlpatterns = [
    path('',views.Index, name="index"),

]
Inside the template/app_name directory , create a new HTML file index.html. Inside index.html
{% extends 'layout.html' %}
{% block content %}
{% load static %}

<section class="user-overview">
    <div class="container">
        <div class="row">

            <div class="col-lg-4 col-md-6 text-center">
              <div class="card-panel">
                <div class="card-info p-3 mt-3 pt-5">
                  <div class="card-heading">
                    <h2>{{within_24_hours}}</h2>
                  </div>
                  <div class="card-words mt-5">
                    <p>Customers in the past 24 hours</p>
                  </div>
                </div>
              </div>
            </div>

            <div class="col-lg-4 col-md-6 text-center">
              <div class="card-panel">
                <div class="card-info p-3 mt-3 pt-5">
                  <h2>{{within_past_week}}</h2>
                  <div class="card-words mt-5">
                    <p>Customers in the past one week</p>
                  </div>
                </div>
              </div>
            </div>

            <div class="col-lg-4 col-md-6 text-center">
              <div class="card-panel">
                <div class="card-info p-3 mt-3 pt-5">
                  <h2>{{total_customers}}</h2>
                  <div class="card-words mt-5">
                    <p>Total Customers</p>
                  </div>
                </div>
              </div>
            </div>

            <div class="col-lg-4 col-md-6 text-center">
              <div class="card-panel">
                <div class="card-info p-3 mt-3 pt-5">
                  <h2>{{total_users}}</h2>
                  <div class="card-words mt-5">
                    <p>Total Users</p>
                  </div>
                </div>
              </div>
            </div>

            <div class="col-lg-4 col-md-6 text-center">
              <div class="card-panel">
                <div class="card-info p-3 mt-3 pt-5">
                  <h2>{{super_users}}</h2>
                  <div class="card-words mt-5">
                    <p>Super Users</p>
                  </div>
                </div>
              </div>
            </div>

            <div class="col-lg-4 col-md-6 text-center">
              <div class="card-panel">
                <div class="card-info p-3 mt-3 pt-5">
                  <h2>{{staff_users}}</h2>
                  <div class="card-words mt-5">
                    <p>Staff Users</p>
                  </div>
                </div>
              </div>
            </div>


        </div>
    </div>
</section>


{% endblock %}
if you are to switch to localhost:8000 you should have a screen similar to this
Create Customer view
After creating our dashboard view, we want to create a page that allows users to view and add customers.
To do this, we need to create the function inside views.py
@staff_member_required
def Get_Customers(request):
   if request.user.is_authenticated:
       customers = Customers.objects.all()
       context = {
           "customers":customers
       }
       return render(request,'app/customers.html', context)
In urls.py, we need to add the path pointing to this function
urlpatterns = [
   path('',views.Index, name="index"),
   path('customers',views.Get_Customers, name="customers_list"),
]
The next thing to do is to configure our HTML. Create an HTML file called customers.html inside our app templates folder
{% extends 'layout.html' %}

{% block content %}

{% load static %}

<section class="customers">
   <div class="container">
       <div class="row justify-content-center">
           <div class="col-md-8 col-lg-12">
               <h2>
                   Customers
               </h2>
               <a href="" type="button" class="btn btn-primary btn-md shadow-none mb-3" name="button">Download as CSV</a>
    <a href="" type="button" class="btn btn-success btn-md shadow-none mb-3" name="button">Add customer</a>
           </div>
       </div>

       <div class="row">
           <div class="col-md-12 col-lg-12">
               <table class="table table-bordered p-sm-4">
                       <thead>
                           <th>
                               Name
                           </th>
                           <th>
                               Email
                           </th>
                           <th>
                               Action
                           </th>
                       </thead>
                       {% for c in customers %}
                       <tr>

                           <td>
                               {{c.first_name}} {{c.last_name}}
                           </td>
                           <td>
                               {{c.email}}
                           </td>
                           <td>
                               <a href="" class="btn btn-sm btn-danger">Delete</a>
                           </td>

                       </tr>

                       {% endfor %}
               </table>

           </div>
       </div>
 </div>
</section>


{% endblock %}
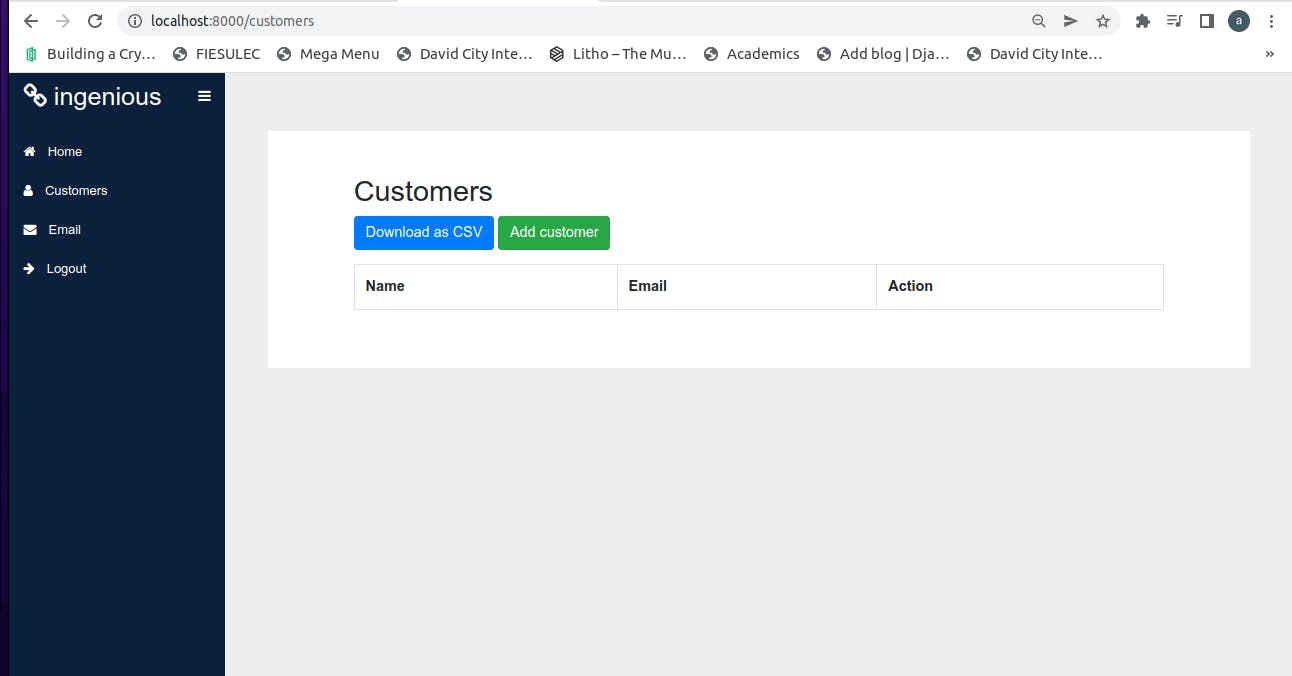
If we visit our URL, localhost:8000/customers. We should have a screen like this
Add a customer
To add a customer we need to define its function, set its URL and also set its templates as we have done
In `views.py`

@staff_member_required
def Add_Customer(request):
   if request.user.is_authenticated:
       if request.method=="POST":
           first_name = request.POST["f_name"]
           last_name = request.POST["l_name"]
           email = request.POST["email"]
           if first_name and last_name and email:
               Customers.objects.create(first_name=first_name, last_name=last_name, email=email)
               messages.success(request,"Customer added successfully")
               return redirect('add_customer')
           else:
               messages.info(request,"All fields are required")
               return redirect('add_customer')
       return render(request,'app/addcustomer.html')
In urls.py
urlpatterns = [
   path('',views.Index, name="index"),
   path('customers',views.Get_Customers, name="customers_list"),
   path('add-customer',views.Add_Customer, name="add_customer"),
]
To set our HTML, create a new HTML and call it addcustomer.html
{% extends 'layout.html' %}
{% block content %}
{% load static %}

<section class="add-user">
   <div class="container">
       <div class="row justify-content-center">
           <div class="col-md-12 col-lg-12">
               <h2>
                   Add New Customer
               </h2>
           </div>
       </div>

       <div class="row justify-content-center mt-3">
           <div class="col-md-12 col-lg-12">
               <form action="{% url 'add_customer' %}" method="POST">
                   {% csrf_token %}
                   <div class="row">
                      <div class="col-lg-8 col-md-8 mt-2">
                           <div class="form group">
                               <label for="first name">First Name</label>
                               <input type="text" class="form-control" required name="f_name">
                           </div>
                       </div>

                       <div class="col-lg-8 col-md-8 mt-3">
                           <div class="form group">
                               <label for="Last Name">Last Name</label>
                               <input type="text" class="form-control" required name="l_name">
                           </div>
                       </div>

                       <div class="col-lg-8 col-md-8 mt-3">
                           <div class="form group">
                               <label for="email">Email</label>
                               <input type="email" class="form-control" required name="email">
                           </div>
                       </div>

                       <div class="col-lg-8 col-md-8 mt-3">
                           <button class="btn btn-outline-white btn-md btn-success" type="submit" name="submit">Add customer</button>
                       </div>

                   </div>
               </form>
           </div>
       </div>
   </div>
</section>


{% endblock %}
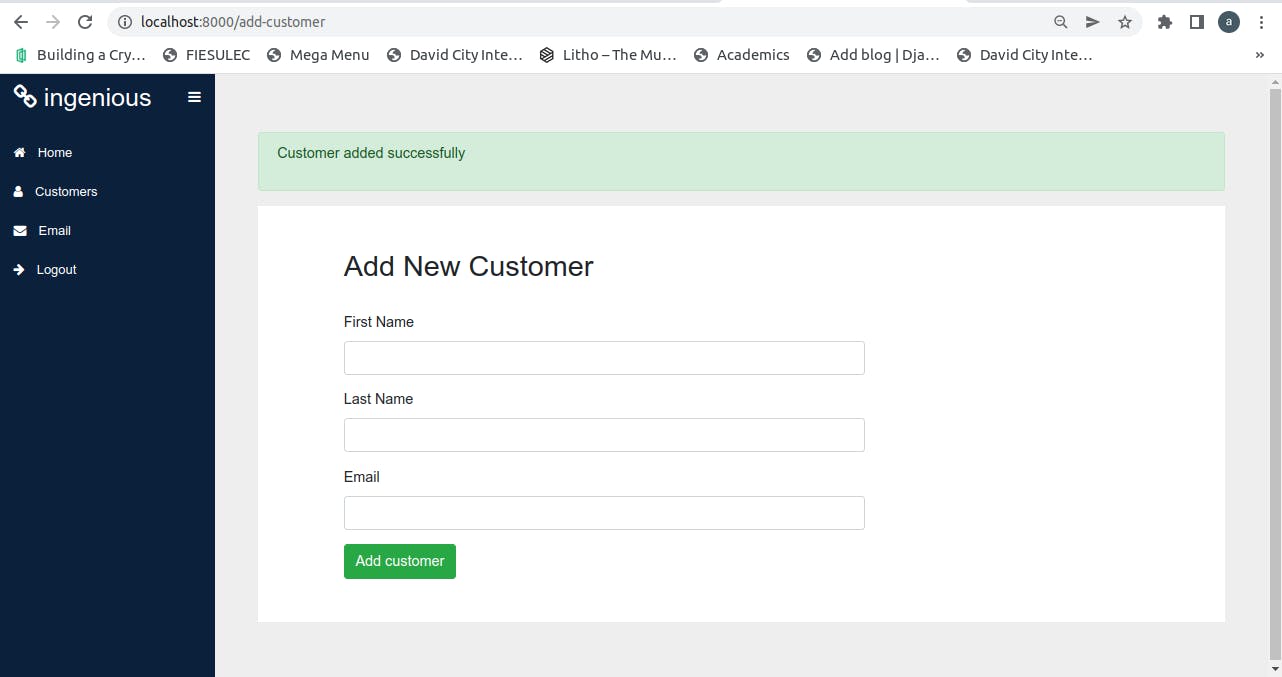
Now we can switch to localhost/8000/add-customer to test the function we have created. Input a suitable name and an email. If successful, you should have feedback like this
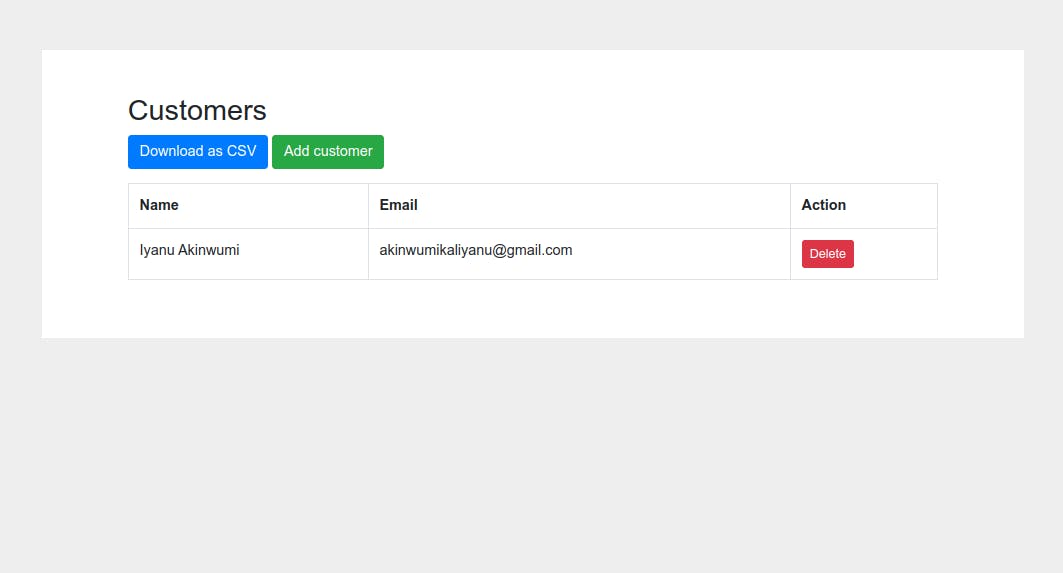
If you go back to localhost:8000/customers, you should have something like this
The next thing is to add the URL pointing to this page on our customers' page. Inside customers.html, add the URL value to the add customer button
<a href="{% url 'add_customer' %}" type="button" class="btn btn-success btn-md shadow-none mb-3" name="button">Add customer</a>
Delete a customer
We can delete a customer by writing a simple function. The method requires us to send the customer id to the views function. The function checks the database for the customer who owns the id.
In views.py
@staff_member_required
def Delete_Customer(request,id):
  if request.user.is_authenticated:
      customer = Customers.objects.get(pk=id)
      customer.delete()
      messages.success(request,"Customer removed succesfully")
      return redirect('customers_list')
In urls.py
urlpatterns = [
   path('',views.Index, name="index"),
   path('customers',views.Get_Customers, name="customers_list"),
   path('add-customer',views.Add_Customer, name="add_customer"),
   path('delete-customer/<int:id>', views.Delete_Customer, name="delete_customer"),
]
Then in customers.html, locate the delete button under the action head in the table then add
<a href="{% url 'delete_customer' c.id %}" class="btn btn-sm btn-danger">Delete</a>
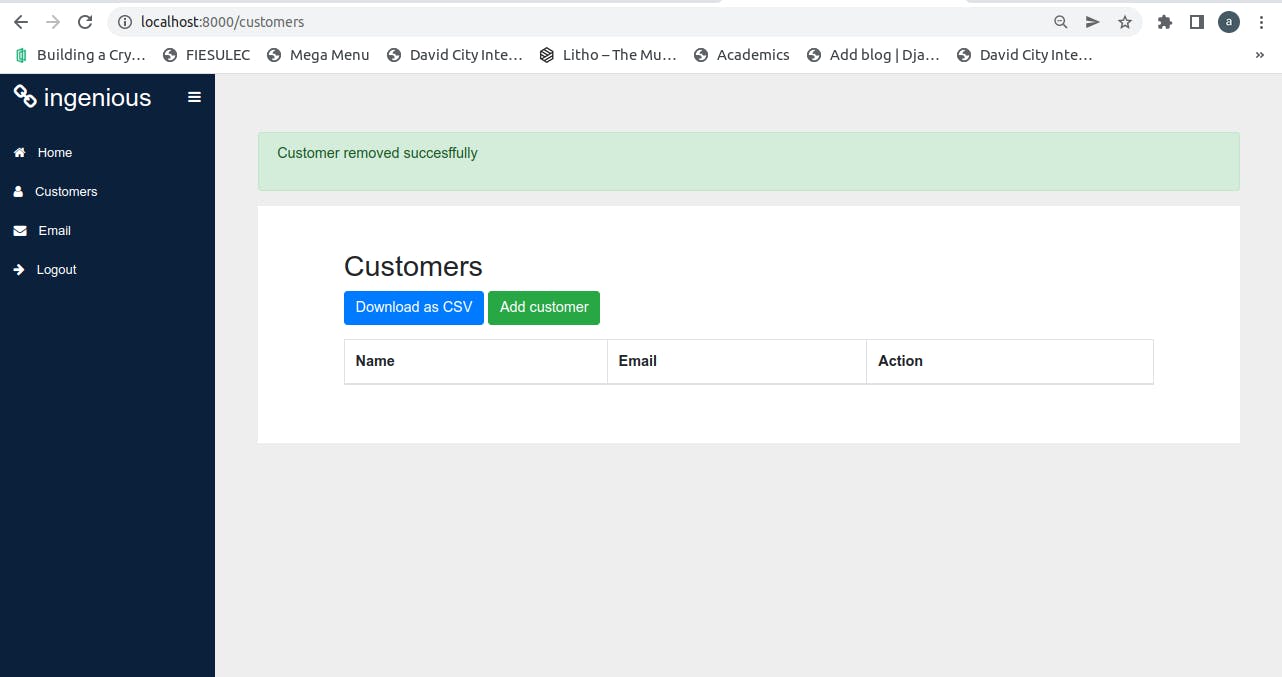
The URL above passes the customer id to the backend for processing. If we try testing this by clicking the delete button, we should have this:
Downloading customers as csv
This is the last thing we need to put in place under the customers' page, to do this we need to use python module known as CSV. We will also need to use HttpResponse.
In views.py,
@staff_member_required
def Download_Customers(request):
  response = HttpResponse(content_type='text/csv')
  response['Content-Disposition'] = 'attachment; filename="customer-list-{}.csv"'.format(int(datetime.now().timestamp()))

  csv_writer= csv.writer(response)
  csv_writer.writerow(['First name','Last name','Email'])
  [csv_writer.writerow([c.first_name,c.last_name,c.email]) for c in Customers.objects.all()]
  return response
The code above will create a CSV writer. It will create rows of First name, Last name, `Email.
In urls.py,
urlpatterns = [
   path('',views.Index, name="index"),
   path('customers',views.Get_Customers, name="customers_list"),
   path('add-customer',views.Add_Customer, name="add_customer"),
   path('delete-customer/<int:id>', views.Delete_Customer, name="delete_customer"),
   path('downlod-user',views.Download_Customers, name="download_users"),
 ]
In the download CSV button inside our customers.html`, add
<a href="{% url 'download_users' %}" type="button" class="btn btn-primary btn-md shadow-none mb-3" name="button">Download as CSV</a>
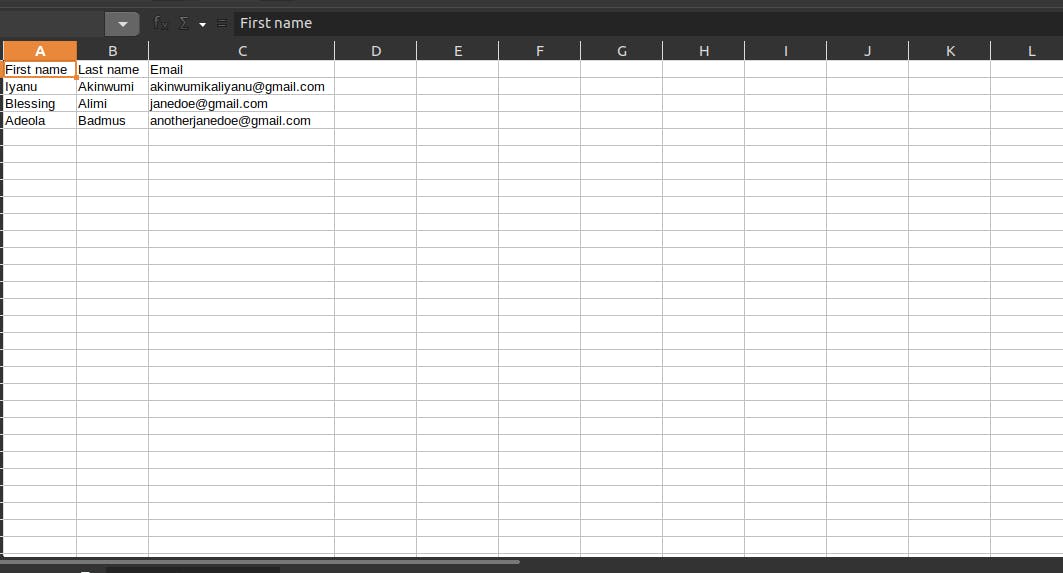
To test this, we can create several users and click the button. Mine generated a CSV file like this
Email function
As an admin or user, we want to be able to send messages to all our customers at once; a promotion email or a downtime notice. To achieve this we need to use Django send_mass_mail module.
We will configure our backend to send to the console. We won't be using SMTP in this article.
In settings.py, add this beneath the codes
EMAIL_BACKEND='django.core.mail.backends.console.EmailBackend'
This will tell Django to send an email to the console. In views.py,
@staff_member_required
def Email_Customers(request):
   if request.user.is_authenticated:
       if request.method=="POST":
           try:
               customers = Customers.objects.all()
           except ObjectDoesNotExist:
               message.info(request,"An error occured somewhere please contact admin")
           subject = request.POST["subject"]
           message = request.POST["message"]
           from_email = request.user.email
           message_list =[]
           if subject and message:
               for c in customers:
                   message_list.append((subject,message,from_email,[c.email]))
               try:
                   success=send_mass_mail(
                       tuple(message_list), fail_silently=False
                   )
                   messages.success(request, f"Email sent successfully to {success} customers")
               except:
                   messages.info("Error occured somewhere")
               return redirect('send_email')
           else:
               messages.info(request,"All fields are required")
               return redirect('send_email')
       return render(request,'app/email.html')
In urls.py
urlpatterns = [
   path('',views.Index, name="index"),
   path('customers',views.Get_Customers, name="customers_list"),
   path('add-customer',views.Add_Customer, name="add_customer"),
   path('delete-customer/<int:id>', views.Delete_Customer, name="delete_customer"),
   path('downlod-user',views.Download_Customers, name="download_users"),
   path('send-email',views.Email_Customers, name="send_email"),
]
Create an HTML file, email.html
{% extends 'layout.html' %}
{% block content %}
{% load static %}

<section class="add-user">
   <div class="container">
       <div class="row ">
           <div class="col-md-12 col-lg-12">
               <h2>
                   Send Newsletter to customers
               </h2>
           </div>
       </div>

       <div class="row">
           <div class="col-md-12 col-lg-12">
               <form action="{% url 'send_email' %}" method="POST">
                   {% csrf_token %}
                   <div class="row">
                       <div class="col-lg-12 col-md-12 mt-3">
                           <div class="form group">
                               <label for="name">Subject</label>
                               <input type="text"  class="form-control" required name="subject">
                           </div>
                       </div>
                         <div class="col-lg-12 col-md-12 mt-3">
                           <div class="form group">
                               <label for="name">Message</label>
                               <textarea name="message" class="form-control" cols="20" rows="20"></textarea>
                           </div>
                       </div>


                       <div class="col-lg-8 col-md-8 mt-3">
                           <button class="btn btn-success btn-lg" type="submit" name="submit">Send email</button>
                       </div>

                   </div>
               </form>


           </div>
       </div>
   </div>
</section>


{% endblock %}
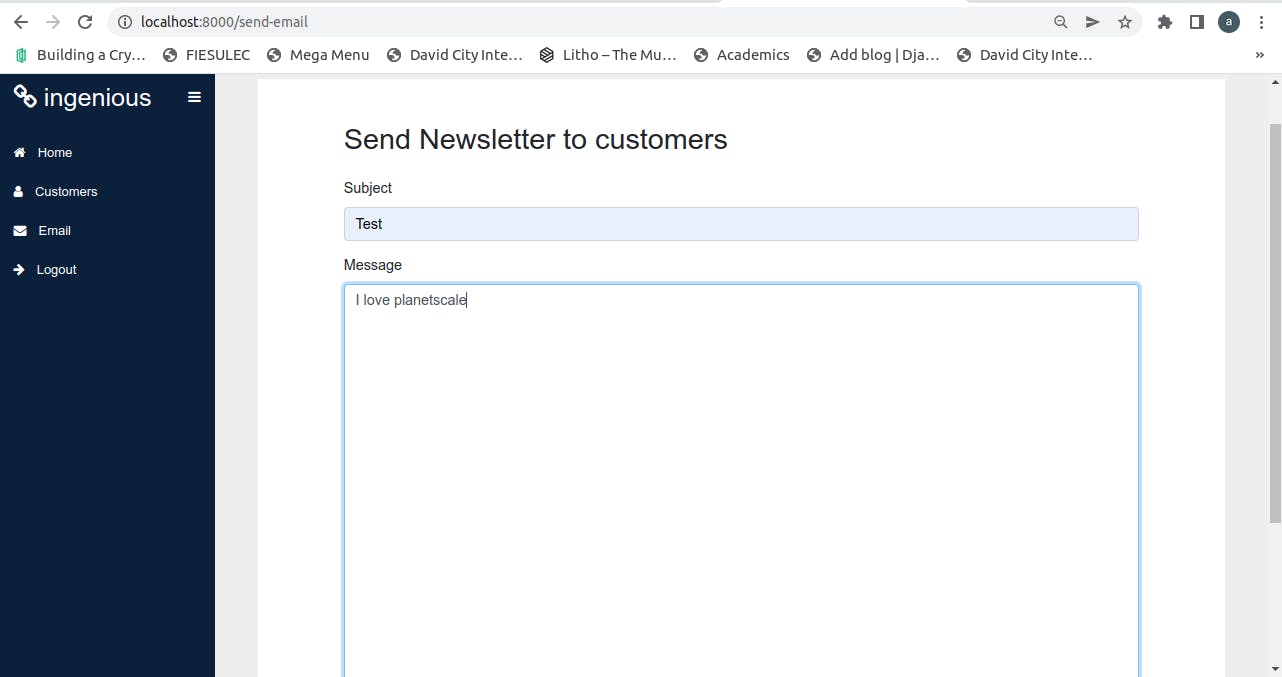
Navigate to localhost:8000/send-email to test, our screen should look like this
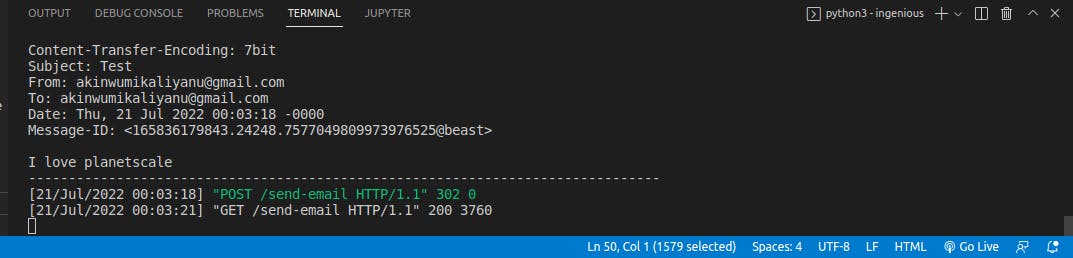
After filling and sending this, we should have the message sent to our terminal
Logout function
The logout function will use Django generic views. since we have been using Django admin properties, we can as well use its logout views
In urls.py
from . import views
from django.urls import path
from django.views.generic import RedirectView

urlpatterns = [
   path('',views.Index, name="index"),
   path('customers',views.Get_Customers, name="customers_list"),
   path('add-customer',views.Add_Customer, name="add_customer"),
   path('delete-customer/<int:id>', views.Delete_Customer, name="delete_customer"),
   path('downlod-user',views.Download_Customers, name="download_users"),
   path('send-email',views.Email_Customers, name="send_email"),
   path('logout', RedirectView.as_view(url='../../admin/logout/'), name="logout")
]
Rounding up
To round up the coding session, we need to add the links to all our pages on the dashboard side bar.
In layouts.html, edit as follow
         <div class="sidebar-menu">
                 <ul>
                     <li>
                         <a href="{% url 'index' %}">
                             <span class="fa fa-home"></span>
                             <span>Home</span>
                         </a>
                     </li>

                     <li>
                         <a href="{% url 'customers_list' %}">
                             <span class="fa fa-user "></span>
                             <span> Customers </span>
                         </a>
                     </li>

                     <li>
                         <a href="{% url 'send_email' %}">
                             <span class="fa fa-envelope"></span>
                           <span>Email</span>
                         </a>
                     </li>

                     <li>
                         <a href="{% url 'logout' %}">
                             <span class="fa fa-arrow-right"></span>
                             <span>Logout</span>
                         </a>
                     </li>

                 </ul>

     </div>
Conclusion
In this article, we have learnt that Planetscale is a serverless database. It doesn’t stop us from using the Django-ORM because it is SQL based. It is an improvement that does not need us to learn new syntax.
We showcased the use of planetscale and Django to build fast and easy CRUD applications. This app can be cloned at steelthedev/planetscale